beauty · make up

Sunset Vibes

GUYSSSS!!!!! I am so proud of this look. Seriously, I normally don’t wear bright colors but seeing as I bought the Morphe 35b palette I better start right? My favorite compliment that I got from this look was from my little sister, she said, ” You can wear bright colors and not look like a clown!!” She was so proud of me for this, she’s my biggest fan and gives me so much support, it’s things like that that keep me inspired and to keep pushing, that one day I’ll get to where I want to be. 007I’m not going to go into full face details on this post, I’m just going to cover the eye shadow aspect of it, but if you have ANY questions, seriously please don’t hesitate to ask!

008

Okay, I know my blending sucks, I’ll get there I promise. Also, it probably doesn’t help that my lighting in my make up room is down right terrible (I’m working on it). But don’t come at me with negative comments, everyone starts somewhere!! I’ll always take constructive criticism though, or any tips or tricks! Okay, now onto the good stuff!!

First I applied Urban Decay primer potion all over my lid. Then I grabbed up my Jaclyn Hillx Morphe palette, which I love to use but hate using it because it is just so damn beautiful! OH YEAH!! If you didn’t get her palette yet she has another restock coming up august 22? I think? Well I’m pretty sure, so set your alarms and get your hands on this palette!! Using a fluffy brush I applied Creamsicle from my crease up to my brow bone. Then I applied Hunts in my crease and blended that into Creamsicle and down to my lid. I then blended Twerk into Hunts and applied it all over my lid. Ontop of Twerk I used a wet brush (I just wet my brush with the Too Faced 3 in 1 spray that I mentioned in my previous post) to apply Royalty on my lid and lower lash line. For the highlight I just applied Beam right under my brow bone and inner corner of my eye. On my lips, I’m wearing NYX Liquid Suede in Pink Lust. Actually before I started buying Kylie Cosmetic’s matte lipsticks, NYX was my go to for mattes, the formula, application and wear is great on them! And there you have it! Sunset vibes all over.

010

How fun right!? And I promise I’m going to really try to keep up on this blog, so hopefully I’ll have another look to serve to you all tomorrow seeing as I’ve just bought like 4 palettes from Morphe! What do you all want to see? Any requests?

Don’t forget to subscribe so you can keep up with all my shenanigans! Till next time xx

beauty · make up

Back to School / Fall make up

Guys I am so sorry I’ve been neglecting my blog, I feel awful. It’s birthday season here, and I swear like half of Chad’s family has an August birthday so, I’ve been a little busy with that.  Also I’ve been getting out more since the pain in my foot has gone down, and the weather has been just perfect lately. I just get so exhausted when I do go out that I feel like I’ve run a marathon and just want to sleep for like days straight, that might be due to depression but whatever hahaha! But I’ve gotten tons of things I want to share with you all, and I’ve been meaning to do a haul post but I am just waiting on one more package still 😦 I’ve seriously bought so much this month it’s almost overwhelming, and I just want to keep spending my money on everything so I need to cut myself off for awhile..if only brands would like give me a month to get my shit together instead of releasing new things.. I’ll keep dreaming.

Okay to the important stuff!! Today’s look I’m serving you is just something simple, but it works for fall, back to school, and when you don’t feel like going all out. falllook

First I just have to say, the more I look at this picture the more I hate it, but oh well. Also shout out to my man’s job for the geotag 😉  If anyone is in the Cleveland area PLEASE check them out, great made from scratch food, amazing cupcakes, great people and a great atmosphere!! Here’s a link for their site!!

For this look I just used #insta flawless from Rimmel London in the shade medium dark, it’s my go to when I don’t feel like doing a full face because it corrects your color, hydrates, and give you an incredible dewy glow, you can even use it as a primer!!  Apply a little bit of blush, I used the e.l.f cosmetics blush palette. Do your brows, I’m still in love with Benefit ka-brow! I think I even saw a video from Huda Beauty where she used it to contour her nose! Which is a great idea I love products with multiple uses!! Then you just mascara (Urban Decay Perversion is my go to) and line your eyes (I’ve been using Marc Jacobs highliner gel crayon lately, it just applies so niceand smooth). Grab up your highlighter (I’m still obsessed with the Anastaia Beverly Hills Aurora Glow Kit) and make everything glow, brow bone, cheek bones, nose, cupids bow, tip of nose. Do it up ya’ll!! You can’t glow enough..am I right? Then when I’m all finished I used Too Faced Hangoverx 3 in 1 replenishing primer and setting spray to set my make up and give me a nice dewy look.  On my lips I’m wearing Kylie Cosmetics in Gorg, this lipstick doesn’t move at all. Seriously all day it stays on, you might have to reapply it once but that’s it. The only downside to this lipstick is sometimes it feels cakey and will crumble but nothing a little blot on a paper towel or napkin can’t fix. And that’s all for this post! I’m so excited for my next look. I used the Jaclyn Hill palette and…

Well I’ll just finish editing this post so I can just share it with you all. Seriously my next look I am so so so proud of. Hope you all are doing well! Till next time xx

beauty · make up · Uncategorized

Lazy Girl Make up

Hey everyone! Can you believe it’s August already!? Where the hell did summer go?! Not that I mind, fall is absolutely my favorite season, the colors, the smells, um pumpkin everything, boots, sweatshirts bonfires, haunted houses, and hayrides! I love fall..can you tell?!

First up I have the Anastasia Beverly Hills Aurora Glow Kit. I bought this last week and have worn it every day since. The colors are gorgeous and buttery smooth, they don’t apply cakey and you can layer and blend colors together. Absolute perfection. I find my self wearing like 2-3 colors at once just to keep it interesting. I’ll do one color on my cheekbones, one below my brow bone, a different one on my nose and cupid bow, it really just depends on how extra I’m trying to be that day.

Okay so today’s look is my everyday go to look, when I don’t feel like doing my eye shadow or a full face of make up this is how i get down.

iphone 031

I just apply Rimmel #insta flawless all over my face, I’ll just use my fingers to apply it but make sure you wipe them off when finished because it is tinted and you’ll leave finger prints on everything you touch afterwards.  Then I’ll do my brows using Benefit Cosmetics Ka-brow! It’s my new favorite go to for my brows! Then apply eyeliner, here I’m wearing Marc Jacobs Highliner Gel Crayon in BBlacquer. I just tight line my eyes and only go about 3/4 of the way on my lower lash line. Then mascara, I use Urban Decay Perversion, I seriously love this mascara it doesn’t clump my lashes together, and makes them long and beautiful. After mascara I just apply a little bit of blush and some bronzer where I would normally contour. Then I apply my highlight  (cheekbone, brow bone above & below, bridge and tip of my nose, cupid bow, and my chin) in the top picture I’m wearing Eclipse and Luna, in the bottom picture I went ham with Spectra because I wanted to glow purple like our waitress the other day.  When I’m all finished I used Too Faced 3 in 1 Replenishing Primer and Setting Spray. and boom, there you have it easy peasy.

006

Well that’s all folks, my next post will either be a haul post or my empties 🙂 til next time xx

beauty · make up · Uncategorized

Urban Decay Moondust Palette

Hey ya’ll sorry for my lack of posting, I’ve been unmotivated and physical therapy has been kicking my ass 😦 BUUUUTTTTT I’ve purchased so much this past week and I can’t wait to share it with you all!! My next post will be of everything I’ve purchased recently…maybe my next one, I’m still waiting on some packages.

Okay so, I hit up Sephora and made some impulse buys.. one of them being this beautiful palette. I totally fell in love with it after only swatching one color in the store I was like” Yep, its beautiful I need to buy it.”  Alsooo I hit up Ulta, only because they were out of the Anastasia Beverly Hills Aurora Glow  Kit at Sephora and well that turned into $200 later…hahaha.

First though let me tell you this story, okay so Chad and I went to dinner at a new restaurant out here called El Taco Macho. We walked in and the first thing I saw was the hostess’ (who ended up being our server) highlight!!! I have never in my life seen something so on point EVER. So naturally we walk in the door and I yelled (yes yelled because when I get excited my volume cranks to like 10) so I yell, ” OH MY GOD CHAD LOOK AT HER HIGHLIGHT SHE IS KILLING IT.  IT IS SO BEAUTIFUL!!!! No joke I wanted to bust out my phone and take pictures with her, but for Chad’s sake I didn’t. But, she was glowing this gorgeous  purple and it was just so beautiful and breath taking. . and that is how I developed a crush on the hostess/ waitress at the restaurant. Hahahaha.

Okay now onto the important stuff!! THE URBAN DECAY MOONDUST PALETTE!! YAY!!!

Okay so first impressions of this palette, I love it!!! The colors are buttery, creamy, so pigmented, and glittery almost duo-chrome like.  I know it doesn’t look like Specter is pigmented on my arm, but I promise you it is, you’ll see in another picture!! There’s not a lot of fall out with these colors, which is great, and they blend just beautifully.  I was nervous because I felt like I could see like the ridges in the bottom of the pan so I was afraid I would use it up fast, like it wasn’t a lot of product, but you really don’t need to use a lot to get a bright bold look.  I’m pretty sure you could apply this with your finger, but after swatching a lot more color sticks to your fingers. so I just opted for the wet brush route.

iphone 021

OH I ALMOST FORGOT!!  I gave up on Anastasia Beverly Hills dip brow. I felt like all the colors I had were so dark, so I gave Benefit Kabrow! a chance, and I love love love it!!

For this look I used  Specter (told you it was pigmented!!) on the inner corner of my eye.  On the upper lash line I used Granite, outer corner I used Vega, and the bottom lash line I used Magnetic. I just used a small liner brush that I had gotten damp with water. I was only originally going to just do Magnetic on my lower lash but then I started playing and next thing you know I was balls deep in this palette and I had like 4 different colors on my eyes. Without using a primer this eye shadow stayed put all day, there was no creasing, or transferring of colors. If they ever release another palette like this one I will most definitely be picking it up

iphone 024

Alright ya’ll that’s it for tonight!! Till next time xx

beauty · make up

Another Jaclyn Hill x Morphe Look!!

What’s up what’s up what’s upppppp!?!? I just got home from physical therapy, so I’m feeling good and motivated!!  I actually wanted to post last night but, my man got off of work semi early so plans changed. He’s a chef so I don’t get to see him as much as I would like to, so I like to give him my undivided attention when he is home. Anyone who has dated a chef or pretty much anyone in the restaurant industry probably understands what I’m talking about. Today I’m going to be serving you another look with the Jaclyn Hill x Morphe palette. I wanted to play with more of the shimmers so this is what I came up with!!

iphone july 2017 992

Okay so face routine…same as always, you can find it here .  It’s boring, I know…. I’m trying to go to Ulta on Monday and do some unnecessary shopping. Anything I should check out? Any reviews you would like to see? Maybe I’ll stop at some drugstores and Sephora too, so let me know!!

iphone july 2017 991

Okay now onto the fun stuff!! Prime your lids with Urban Decay eye shadow primer potion, I used to use a brush but I think it works better applying it with your finger, just a personal preference, do whatever works for you!! I used Pooter in my crease, using a fluffy brush just buff buff buff it out. Using a more dense brush I applied Obsessed all over my lid, and using the same brush I then applied 24/7 in my outer corner and blended it into my crease. Below my brow bone I used Kylie Cosmetics Kylighter in French Vanilla, I also applied this to the inner corner of my eyes. Mascara is Urban Decay Perversion, and eye liner is Covergirl Queen Collection Vivid Impact in Truffle.  On my lips I’m wearing Kylie Cosmetics in Okurr from the Koko Kollection.

iphone july 2017 990

ALSO!!! Speaking of Kylie Cosmetics..is anyone else excited for her next release!?! She reveals it in three days. I’m really am trying to save money…hahaha, who am I kidding. I just want it to be like a super girly pinks and purples and glitters. I’ll keep dreaming.

I think tomorrow I’m going to post a more colorful look. we’ll see how my mood is! I hope you all have a great weekend!! Till next time. xx

Uncategorized

Jaclyn Hill x Morphe

jaclynhill111

Haaaaay ya’ll!! Hope everything has been well for everyone 🙂 I started physical therapy last week, and it has been kicking my ass! But I am finally to the point where I only need one crutch and they’re working on getting me off of crutches totally, so I am very grateful for that. I apologize for lack of posts, and  I feel like I bombarded you on my first day with four posts, so I laid off for a while, butttt I’M BACKKK!!!

For today’s look I finally talked myself into using my Jaclyn Hill x Morphe palette. It was just so beautiful I didn’t want to use it, but I figured when she releases it again in August I would just buy another one, or two, or three. Hahaha.  But yes,  in case you didn’t get yours yet or you want another there will be another release in August!!!!! WOO WOO!!

So I just wanted to do a subtle look, I’ll get to more dramatic ones at a later date. Also, I’ll probably do swatches of this in the next couple of posts because there is something for everyone in this palette, and like I’ve said before it is just so damn beautiful. Can you marry a palette? Cause this one would be my soul mate.

My face routine is always pretty much the same and you can find that on my Rainforest of the Sea post . Except this time I used Anastasia Beverly Hills Dip brow in dark brown, just because I felt like the auburn looked weird with my hair color how it is now. Also, I know my brows are a hot mess, I’m getting them done Monday, I promise. Pinky swear.

jaclynhill11

So here we go!!! I used Urban Decay Eyeshadow Primer to make sure everything stayed put, which it did! Even in this awful,  humid, hot thing we got going on in Ohio right now. After that I applied M.F.E.O all over my lid, followed by Sissy from crease to lash line, and I just blended the two together in my crease. Can we just take a moment to talk about the color Sissy? It is gorgeous!! A beautiful rose gold. Seriously jaw dropping gorgeous!! I just want to say real quick that all the shimmer and glitter shadow in this palette are like butter, they are creamy and smooth and just perfect. Okay girl, get back on track… sooo after I applied Sissy I then applied Faint right in the middle of my lid for a little bit of a POP! On the outer corner I used Cranapple and blended that into my lower lash line and crease. On the inner corner of my eye I applied Faint and blended that with Sissy into the outer corner of my lower lash line, I also applied Faint to my brow bone. And there you go. Eye liner, mascara and you’re done!

jaclynhill1

Oh! My lips!! I’m wearing Kylie Cosmetics in High Maintenance. That’s all till tomorrow folks, where I’ll be sharing another look using the Jaclyn Hill x Morphe palette! YAY!! Take care everyone, till next time. xx


Uncategorized

My Very First Post, Get to know me!!

Hi everyone!! My name is Sarah and as long as I can remember I have loved make up and any and everything beauty. So I thought to myself, “Hey girl, why not make a blog and a YouTube channel to share what you know, and what you love, what you’re passionate about?”

So I did and now here I am!!

I figured, I’ll start the blog first, the YouTube channel is still in the works while I wait on a camera and other things 🙂

But I want you guys to know a little bit about me first.

I’m Sarah, but you can call me Sari (pronounced sare-eeee), my niece gave me that nickname and it has stuck since. I’m 28 years old and I was born in Pittsburgh, PA (this is the part when I  say GO STEELERS!!!). Currently I’m living in a small little town about an hour outside of Cleveland, Ohio called Madison. I have a boyfriend of ten years, and we have ourselves two little fur babies, Riley and Zayna (don’t worry I’m sure all three of them will make an appearance on here at some point). Recently I had surgery on my foot so I’ve been down and out for about two months if not longer, so its time for me to get back to myself and out of this nasty funk!

Okay- now about my love for make up. It started at a young age, really young. I remember one time in fourth grade- Sea World or something came to my school and I had this lipstick color called “Seaweed”, it was this awful green/ turquoise color. I don’t even know where it came from but I was so excited about it so I wore it.  Wellll…I got in trouble.. so much trouble, because of course I was smart enough to not wear it leaving the house, so I put it on when I got to school. Needless to say the teachers didn’t approve and made me take it off, they then proceeded to call my parents.. yes over lipstick. But at that moment I know I wanted to be apart of the beauty industry.  Fast forward about ten years, My boyfriend and I moved to Erie, PA so I could go to Toni & Guy Cosmetology School. So, I went to be a hair stylist, about 3/4 of the way through school I realized I didn’t love it as much as I thought I did, and I was really interested in nails. And that’s how my nail polish obsession began (currently I have about 1,000 bottles). I was good at painting and creative AF, all the girls wanted me to do their nail so, why not go to school to be a nail tech? Well, because I didn’t just love nails, I loved make up too. I wanted to do something that I could do anything or whatever I wanted. So here I am today, writing this blog telling you stuff that you probably care nothing about but don’t worry I’m almost done.

On my blog, I’ll do product reviews, make up tutorials, nail tutorials, DIY skin care (masks and scrubs), etc.  I promise to be always honest, and for this to always be a positive and uplifting blog. I have no time for negativity so if that’s what you’re about, girl bye. Well that’s all for now! Time to get to my first “real” post, not this boring ass shit.

Uncategorized

Retro Look

Last one for today, I promise. So, let’s start with a story.. on Monday I went to Walgreens, I just needed to get out of the house, I’ve been locked up inside for two months laying on a couch. Yay foot surgery!! I didn’t really plan on buying anything I really was just trying to get out of the house.  Well, I found their fake lashes and I was all  like alright girl, lets do this. So I grabbed up a starter kit, it came with lashes, glue, scissors, a mirror and little tweezer type things. I also picked up like two or three more packages  of lashes and some brushes..so $90 later I’m at the register (funny how that happens, right?) and the boy rings me out tells me the total, I open my wallet and was just like shittttt. I totally thought I had more money than I did. So I look over at chad (my man) and I asked if I could borrow some money and he said how much and I told him the exact total. OOPS!! And that ladies is how you get your man to buy you stuff.  The end.

Okay so I’ve watched a million tutorials on how to apply fake lashes and it looks so easy.  Let me tell you something, ITS NOT EASY AND IT’S FRUSTRATING. So I measure the lashes, you’ll probably have to cut some off cause they come really long, make sure you are cutting the outer corner and not the inner one! Then you apply the glue, let it dry 30 seconds, looking down into a mirror plop it on your eye lid as close as you can get to your regular lash line and adjust, make sure your edges are nice and secure. That’s pretty much the gist of it. Well it seems easy, but before I knew it I was sweating and cursing, covered in lash glue and just angry. So here’s  some tips I have for you in my failed attempt with false lashes:

  • like i said, measure & trim the outer corner, not the inner. the inner corner will have shorter lashes that make it blend more into your natural lashes. Don’t cut too much off you can always cut more but you can’t add it back!
  • apply the lashes to the eye it matches. when you hold the packages in front of your face, with the lashes facing away from you that’s how you know which one goes on which eye.
  • seriously do your eye liner before you apply the lashes, it will blend better. I normally don’t do eyeliner above my lashes because I have hooded eye lids, and  I feel like it makes my eyes small, but next time I will do it before. I tried to line over top like an idiot, I don’t know why i thought that would work..it didn’t.
  • when applying your lashes you want to be looking not completely down at a mirror but that awful unflattering angle where you can see up your nose. This will lower your lid and make it easier to apply
  • LET THE GLUE DRY A LITTLE BIT FIRST!!! Otherwise, you’ll end up with your lashes sliding all over the place, glue all on your eyelid, just a bad situation all over. I used a clear glue, they do make a black one but I was like I’ll just use clear in case I screw it up too bad, which I did. The good thing about clear glue is it’ll start to turn a light blue as it dries, but it does dry clear if that makes sense. So count to 30 after you apply the glue and you should be good to go.
  • some people apply mascara to their natural lashes before they apply their fake ones, some do it after. I tried it before and I think it made it so much more difficult because it made my natural lashes longer and they just got in the way

lashes

So here is my failed attempt with lashes and a little winged liner with a red lip, to me its a very retro look so that’s what I pretended like I was going for. On my lips I’m wearing Kylie Cosmetics in Okurr from the Koko Collection. OH YEAH!! And this is my first post with my fuchsia hair!! I used Ion color Brilliance in Fuchsia (duh) the first time I did it I used two tubes and ran out at the top of my head so that’s why it looks kinda wonky, but since my boyfriend is a darling he stopped the next day when he got out of work and picked me up two more tubes of color. I love how it turned out, it’s so beautiful. My only suggestion is that if you purchase this color buy double what you normally would. Normally I just use two tubes, but this color is very thick and doesn’t spread that well, so in total I used four tubes. Alright folks that is all for today,  I am whooped but  i feel so accomplished and I’m really looking forward to this whole blog thing, it’s very relaxing! leave any suggestions or things you’d like to see in the comments!!  I look forward to meeting so many new people on this journey!! Till next time xx


Uncategorized

Urban Decay Naked Heat

Alright, I’m just going to keep going. How many of you are dying to get your hands on the Urban Decay Naked Heat palette? Well I got it on the pre-order and I absolutely love it, it’s a sexy palette. Perfect for all my green eyed ladies, and blue and brown…okay this palette will suit everyone.urbandecaynakedheat1

Now there’s been tons of hype about this palette and I’m pretty sure it damn near broke the internet once it was announced, I swear I couldn’t get on any social media without seeing something about it. Also there was a lot of controversy about the swatches in this palette. On some the color was eh, and on others the color was bangin. I only ran into issues with the matte colors when swatching, they were streaky or not really pigmented but they applied beautifully to the eyes. So from this I realized you can’t really base a palette off a swatch because you’re not really applying it how you normally would. Now let me tell you how I do my swatches. I just take my finger run it across the shadow and wipe it on my arm, BAM. There you have it, huge secret, I know. Some people will wet their brush or finger and apply it and that’s fine, but I feel like if you’re doing a swatch I want to see it in its original state. I’m not going to go into a full detail tutorial on this post because I don’t really remember the colors I used, but I do have swatches and a finished product picture, that counts for something right? I think on my lips though I’m wearing Kylie Cosmetics in Heir it’s one of her metal mattes.urbandecaynakedheatswatch

What do ya’ll think, did you buy this? Will you be buying this palette?

Till next time xx

Uncategorized

Tarte Rainforest of the Sea Vol. III

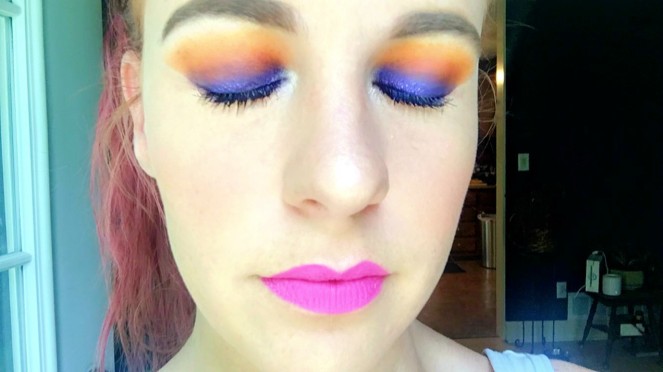
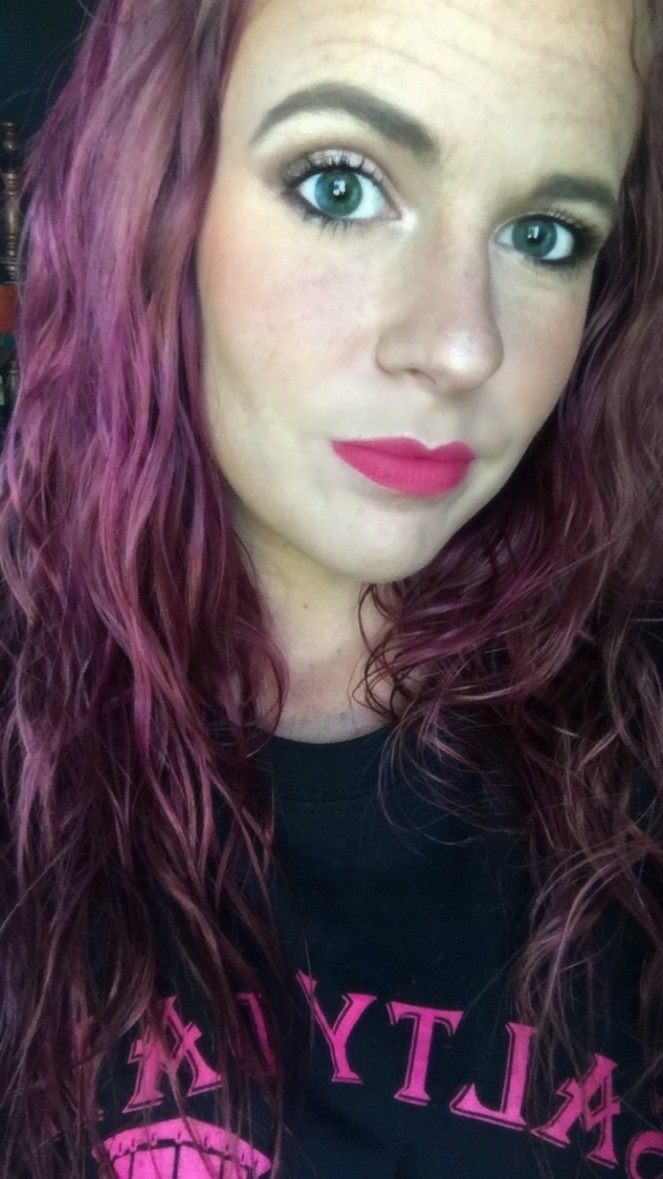
Hi everyone!! The first look I’m going to be serving you today is one using the Tarte Rainforest of the Sea Vol. III palette. This palette ya’ll… I’ll tell you what, it is so damn beautiful it’s seriously perfect for day or night. The colors are all so creamy and pigmented, you could use your finger to apply and it would be perfect. My only complaint about this palette is that the matte shade is so light it barely shows up on me. That’s it, that’s the only complaint. rainforestoftheseaAlso, I don’t have a lot of pictures to go with this post, just the final product, but if you have any questions feel free to ask!!

The first thing I did was prep my face! Make sure you’re face is clean, and you’ve applied any lotions or cream you use.

Follow up with a primer! Now me, sometimes I can be lazy.. okay a lot of the time I can be lazy so I use a tinted primer. It’s from Rimmel London and it’s called #Instaflawless, I got it at Walmart but I’m sure you can find it anywhere that sells Rimmel London products. I love this primer because immediately you get a nice dewy glow, and it’s SPF 15 which is great because I never apply sunscreen (bad girl, I know). Now it doesn’t cover pimples or breakouts, but it does cover my bags under my eyes, and sometimes I’ll just wear this with some mascara for a real natural look. Also I don’t always wear foundation so this makes all my color pretty even. Just a little squirt and I just use my hands to apply it to my face. **ALSO BECAUSE IT IS TINTED MAKE SURE YOU WASH YOUR HANDS OR YOU’LL LEAVE TINY LITTLE BROWN FINGER PRINTS EVERYWHERE***

tarterainforestoftheseaswatch

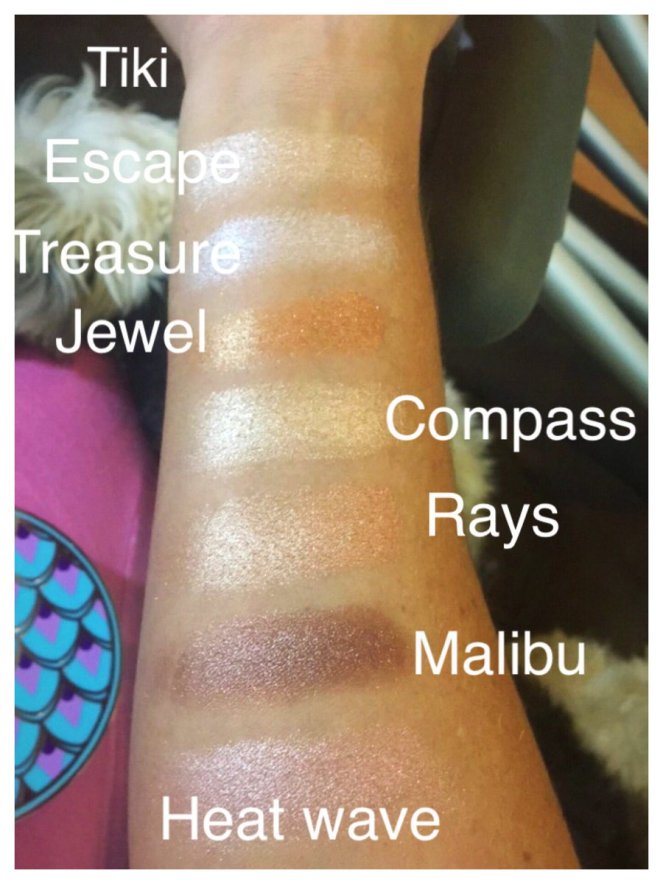
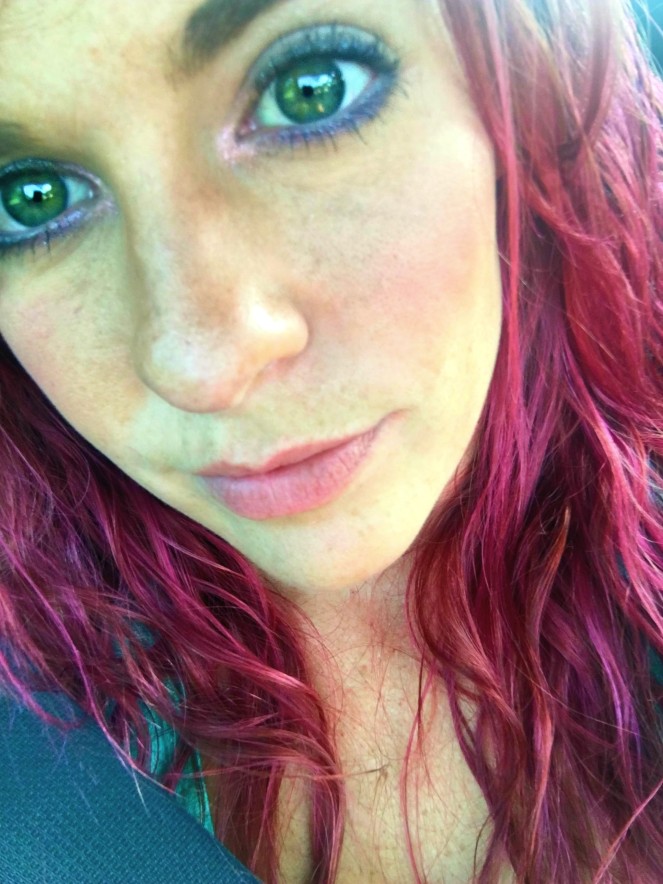
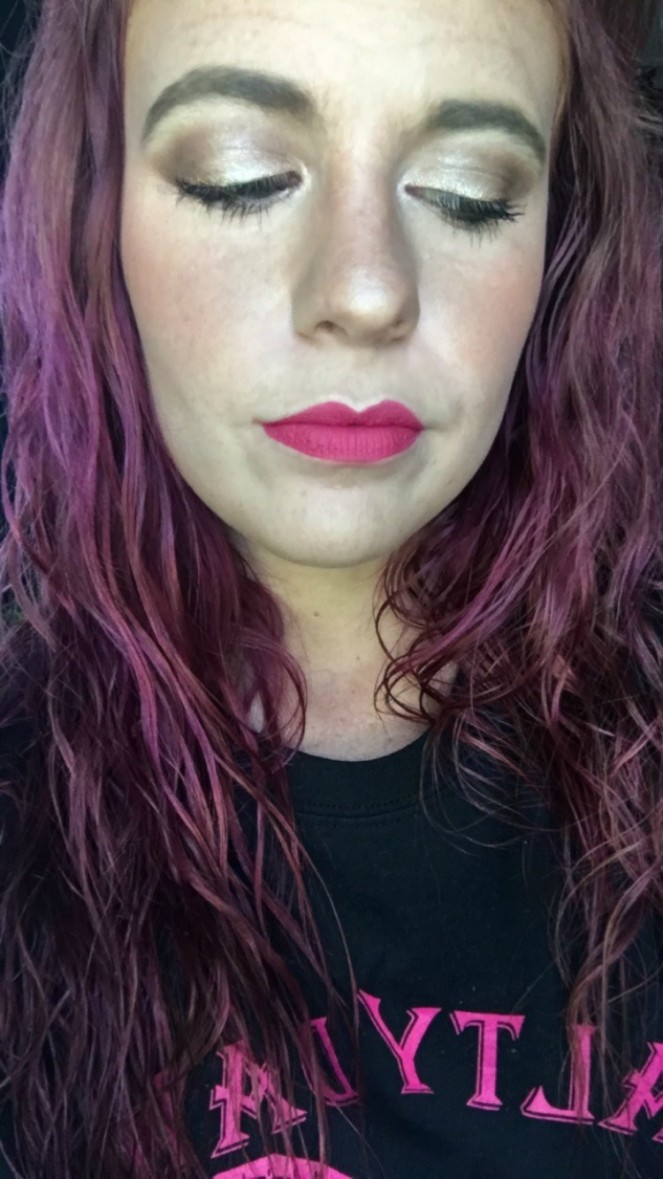
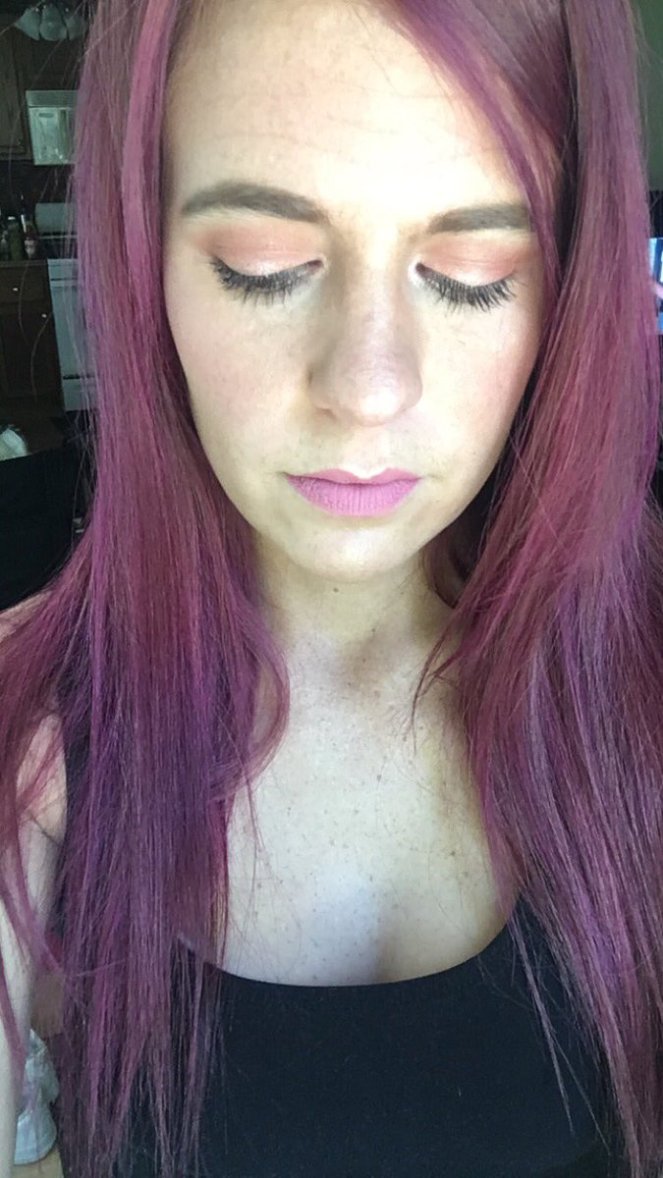
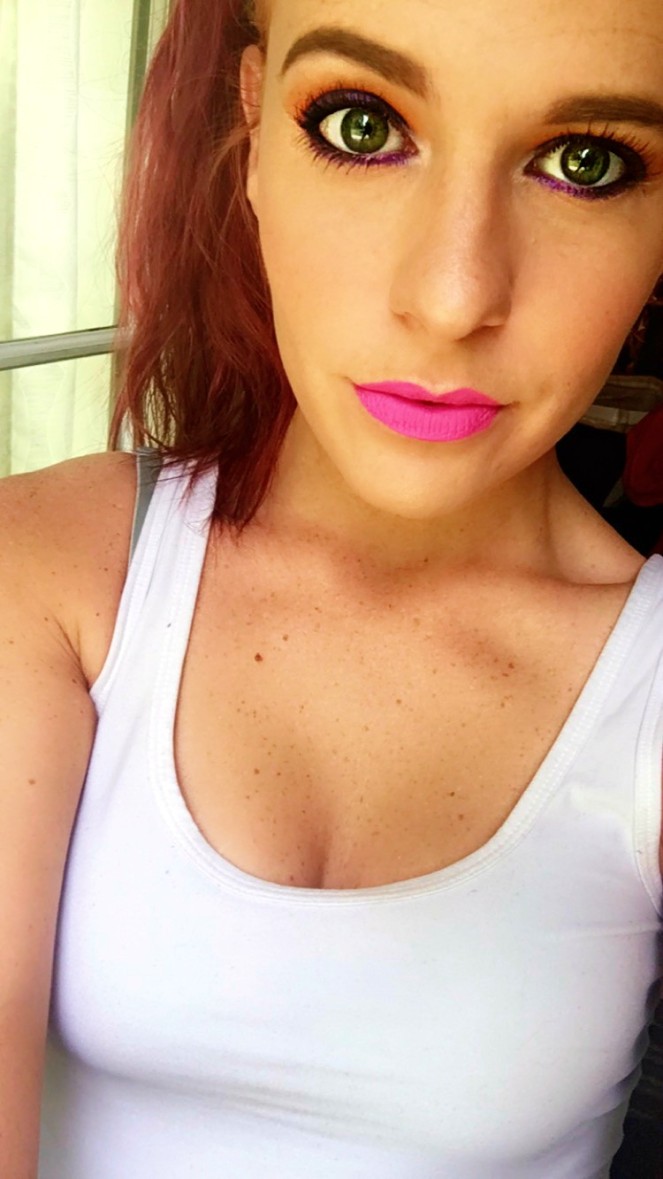
After that I do my eyes. Don’t judge my brows, I know they need done. I start with my brows using Anastasia  Beverly Hills Dipbrow in Auburn, cause I’m naturally a red head, even though my hair is currently fuchsia as of Tuesday.  First you outline your brow then fill it in ( I’ll do a tutorial on this later). After my brows are done I move onto my eyes, I start with Urban Decay Original Eyeshadow Primer, just a little dab on your lids and I like to use an eyeshadow brush to make sure it covers my whole lid evenly. ONTO THE EYESHADOW FUN STUFF YAYYYYY!!! I applied escape all over my lid from lash line to brow bone using a blending brush. Then, I used Malibu starting at the outer corner and blending towards the inner corner. After that apply treasure to the inner corner for a pop of color. After the eyeshadow apply your mascara of choice. Mine is Urban Decay Perversion and your eyeliner, I use Covergirl Queen vivid impact in midnight. I tight line my eyes (apply eyeliner right under your upper lashes) and I only go about half way on the bottom lashes. You’ll find that my eye routine rarely changes, the only thing i change is the shadow, but I can also do a tutorial on that at a later date.

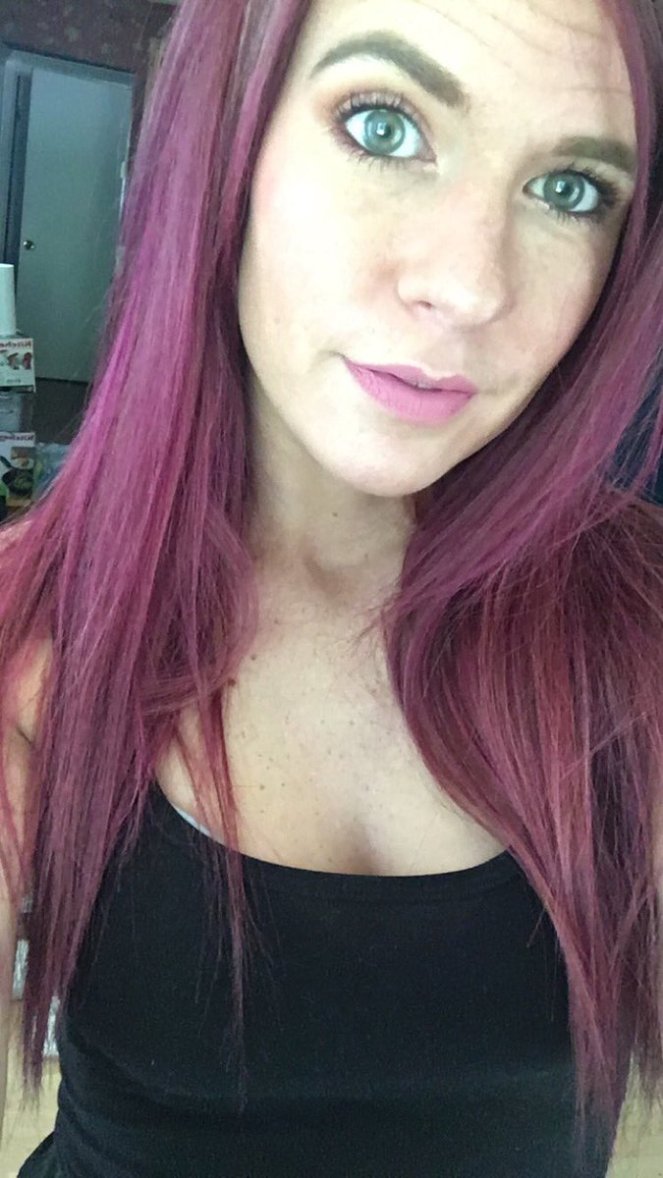
Okay now that you’re eyes are beautiful, lets move onto the face, remember we already primed, now I contour. I use the Wet n Wild megaglo dual ended contour stick. On the parts of your face you want to pop (under eyes, bridge of nose, a little below the cheek bone but above the jawline, around your brows and on your chin, and cupids bow) use the light side. On the parts of your face you want to be smaller (hairline, on each side of the bridge of your nose, jaw line, and ill do a little bit right below my lip to make lips look plumper, and directly under your cheek bones) you use the darker side. To blend this all together i use a few drops of Hard Candy Illuminating & strobing mix in drops and a beauty blender. I apply a drop to my forehead, a drop under each eye and a little bit on my chin, just for that extra glow. Cause really can you glow enough?..I think not. After that I go back over all my contouring with the Wet n Wild mega glo Contouring palette, but this one is a powder so it doesn’t make my face look so oily. You’ll follow the same steps as the contouring stick, except this time use a brush. Then its time to blush, highlight, and bronze.

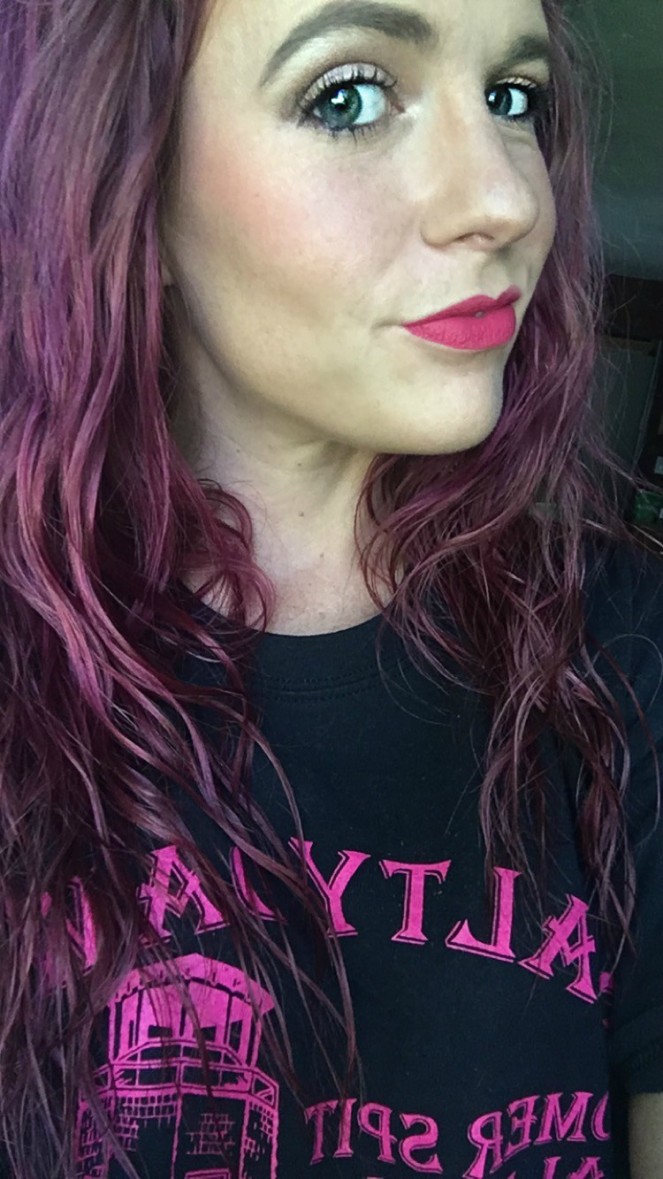
For my blush I use the e.l.f blush palette i seriously just mix all four colors together and apply to my cheek bones, but not below the apple of my cheeks, when I’m finished with that I’ll brush the leftovers on my forehead and my chin, I don’t know why I do this, I feel like it just pulls your look together. The bronzer  I use is also from e.l.f and I do the same thing, I mix all 4 together, and you’ll apply that in all the places you used the darker color for your contour. Now the best part, my favorite, the highlight, I use Kylie Cosmetics in strawberry shortcake and french vanilla. I apply it in a “C” shape from above my brow down to the top of my cheek bone, the tip of my nose and my cupid bow, and just a little bit on my chin.

For my lips I used Kylie cosmetics in harmony. nothing too exciting there, haha.

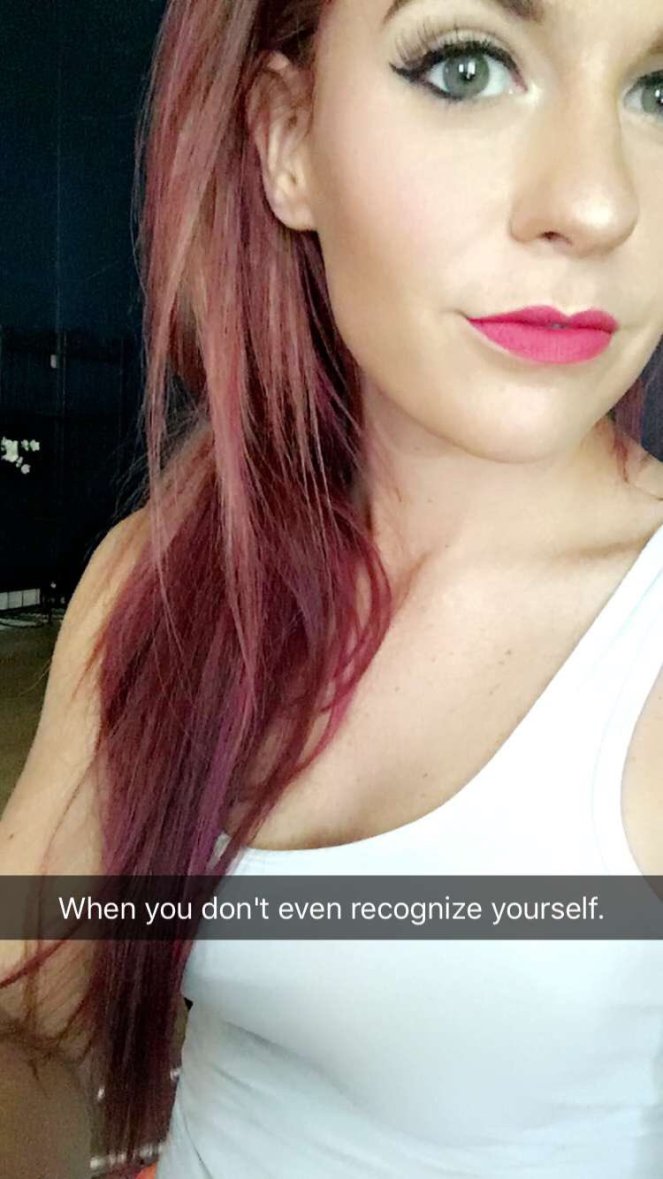
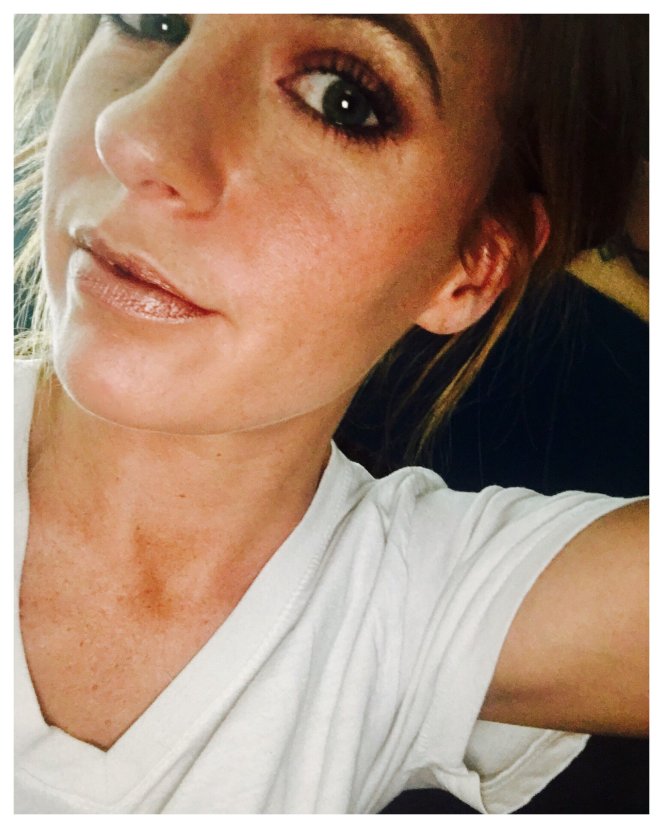
And that’s it guys, that’s how I achieved this look. if you have any questions or suggestions, or maybe something you’d like to seem me do please don’t hesitate to reach out, i don’t bite 🙂 till next time, take care. xx